At the same time, some users don’t even know the basics of Notepad. Fret not! Using the Notepad app on the latest Windows 11 or any version of Windows is pretty simple, and this guide makes it more effortless. This article talks about all the features of the Notepad app in a detailed manner to help you become better at using the Notepad app.
How To Access Notepad in Windows 11?
Notepad has many useful features, but to use those features, you must know the steps to access Notepad. There are eight ways to access the Notepad app on Windows 11. Let’s check all the methods one by one.
1. Using Windows Search Box
One of the ways to launch the Notepad program on your Windows 11 PC is through the Windows Search Box. Check the below-mentioned steps to know the entire process of accessing Notepad using Windows Search Box:
- Open the Windows Search Box using the Windows + S keyboard shortcut.
- Now, type notepad in the Windows Search Box and hit Enter.
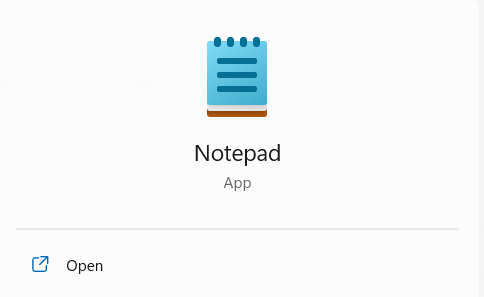
- Click on Open underneath the Notepad app to open it.
2. From Windows Start Menu
You can also open Notepad using the Windows Start Menu. The process is pretty simple, and you can check the same by reading the steps given below:
- First, click on the Start icon in the taskbar.
- Click on All apps > to view all the applications installed on your Windows 11 PC.
- Search for the Notepad app in the All apps > section.
- Lastly, launch Notepad on the system once it’s found.
3. By Right-Clicking Anywhere On Your Desktop
Another easy way to launch the Notepad app on a Windows 11 PC is straight from the desktop. Here are the steps to do the same:
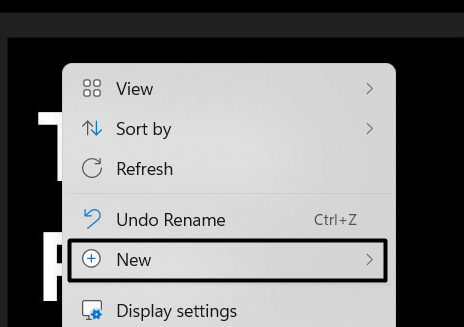
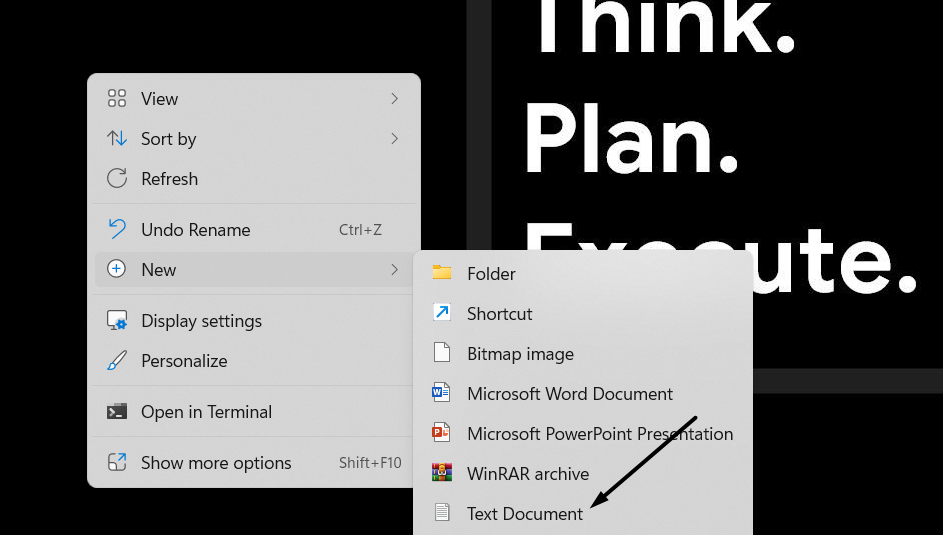
- Right-click on the desktop and hover the arrow on New in the contextual menu to open the sub-menu.
- Now, select Text Document from the sub-menu to create a new text document.
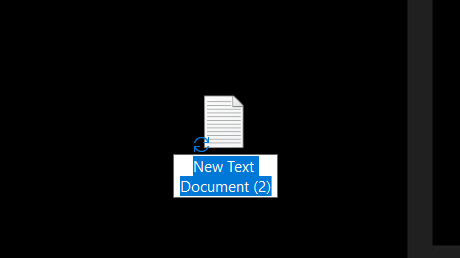
- Then, name the text document and hit the Enter key on the keyboard to save it.
- Once done, double-click on the newly created document to open the Notepad program.
4. Using the Notepad Shortcut
You can also use the Notepad shortcut to access Notepad on your Windows 11 system anytime with a single click. It’s pretty straightforward, and the below-mentioned steps explain the same:
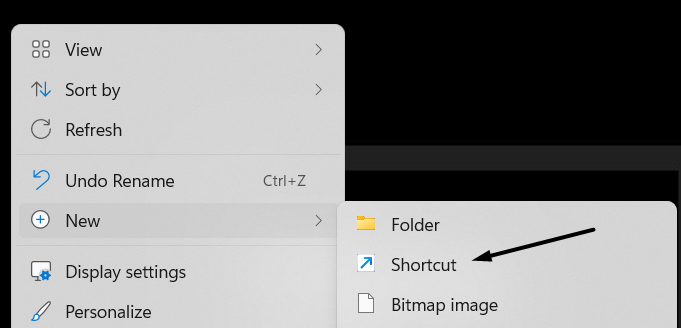
- To start, right-click on the desktop, hover the arrow on the New option, and select Shortcut from the sub-menu.
- Now, enter notepad.exe in the Type the location of the item field and click Next to continue.
- Then, give a name to the shortcut in the Type a name for this shortcut field and click Finish to create the shortcut.
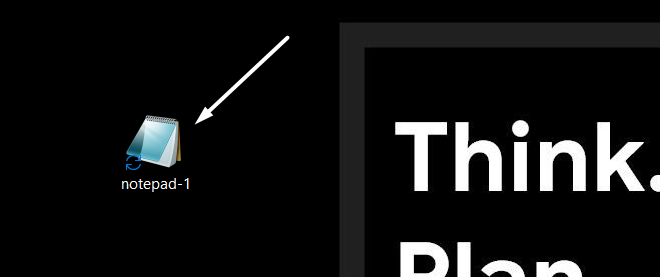
- In the end, move back to the desktop screen and double-click on the shortcut you created in the previous step.
5. Via Run Command Box
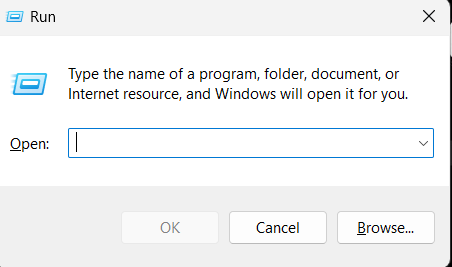
Run dialog is also an excellent way to launch the system’s programs and other utilities with less effort. You can open Notepad using the Run dialog. Follow the below-mentioned steps:
- Firstly, open the Run dialog using the Windows + R key combination.
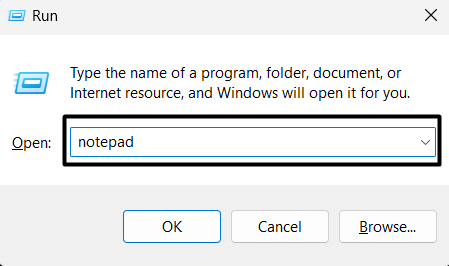
- Lastly, type notepad in the Run dialog’s search box and press the Enter key to open the Notepad program.
6. Using Terminal, Command Prompt or PowerShell
Utilities like the Terminal app, Command Prompt, or Windows PowerShell allow accessing Notepad with a simple command. Below are the steps to open the Notepad app using these Windows utilities:
- To start, press the Windows + S shortcut to open the Windows Search Bar and type Terminal app in it.
- In the end, open the Terminal app and enter notepad in the console to launch the Notepad app in a few seconds.
7. Via Task Manager
Another way to open the Notepad app on your PC is using the Task Manager program. Follow the below-mentioned steps to learn to do the same:
- Firstly, use the Ctrl + Shift + Esc keyboard shortcut to open the Task Manager app.
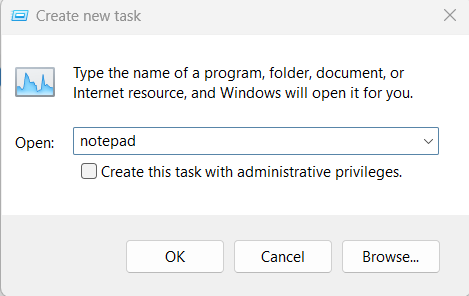
- Now, click on the Run new task option in the top menu to open the Run dialog.
- Then, type notepad in the search box and press the Enter key to open the Notepad app instantly.
8. With Cortana Virtual Assistant
Cortona is Microsoft’s productivity assistant that helps us access programs like Notepad using simple voice commands. The below-mentioned steps demonstrate the same:
- Use the Windows + S key combination to open the Windows Search Bar and type Cortana.
- Select Cortana from the Best match section to open Cortana.
- Once the Cortana app is opened, click on the Microphone icon at the bottom right corner of the window and speak Open Notepad. It’ll now launch Notepad on your Windows 11 PC.
How to Open Existing and New Files Within Notepad
You can use Notepad to open existing text documents and create new text documents with ease. You can learn to open and create new text documents in Notepad with the help of this section.
How To Open an Existing File in Notepad
If you want to open an existing text document in Notepad, you can easily follow the steps mentioned below:
- To start, open the Notepad app on your Windows 11 PC.
- Click on the File option in the top menu and select Open from the dropdown menu.
- Finally, select the text (.txt) document from the storage and click on Open to open the specific file in Notepad.
How To Create a New File in Notepad
Here are the steps to create a new text document in the Notepad program:
- Start by launching Notepad and clicking on the File option in the menu bar at the top.
- Then, select the New option to create a new text document. You can also press the Ctrl and N keys at the same time to do the same action. You’ll see a new blank text document on the screen once you follow the mentioned steps.
How To Cut, Copy, Paste, Find Replace and Select All in Notepad
You’re now ready to use Notepad to jot down ideas, thoughts, etc. However, to use the Notepad app to its fullest, it’s necessary to understand basic editorial skills, such as copy-paste, finding, replacing, and selecting all. Let’s learn all this in this section.
Copy-Paste & Select All Text in Notepad
To copy the text in Notepad or anywhere, use the Ctrl + C keyboard shortcut. On the other hand, use the Ctrl + V key combination to paste the text in Notepad or anywhere. You can also do the same by choosing the Copy and Paste option from the contextual menu. If you want to select all the text in the document, use the Ctrl + A key combination.
Find & Replace Text in Notepad
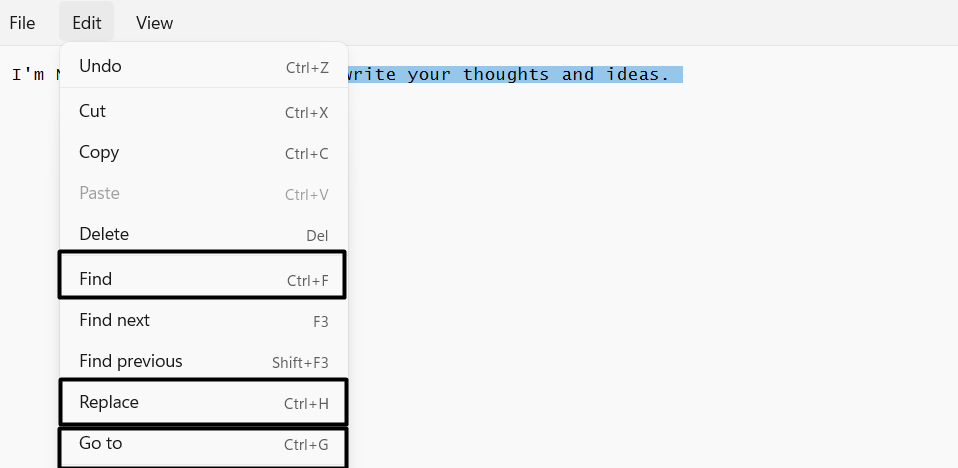
If you want to find a specific word in the document, press the Ctrl and F keys simultaneously and enter the term you want to look for in the Find field. You can press the Ctrl and H keys at the same time to replace a word or line with another. Notepad also allows jumping to a specific line using the Ctrl + G keyboard command.
How To Change the Font, and Font Size
Here in this section, we’ve thoroughly explained the steps to change the font type and size of the text in Notepad. You can start following the below-mentioned steps:
- To start, open the Notepad program on your Windows 11 PC and click on the Edit option in the ribbon menu at the top.
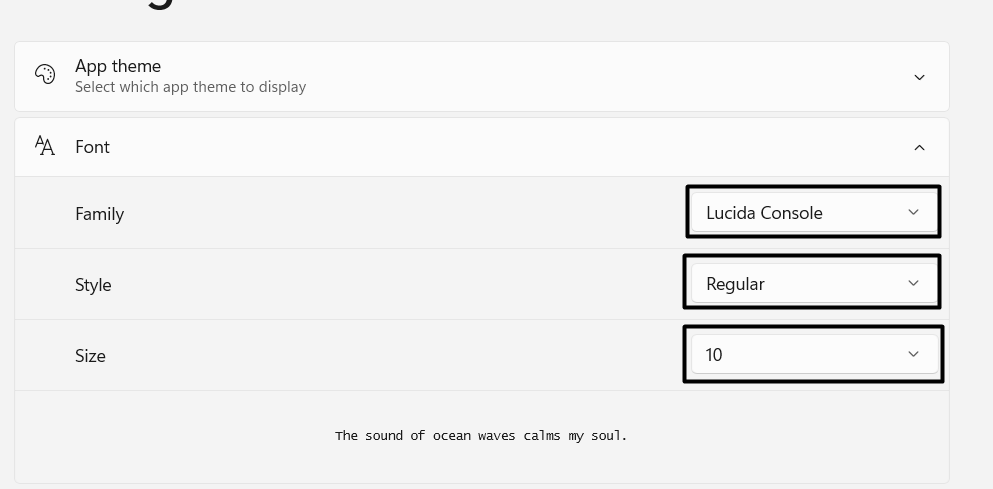
- Select the Font option from the dropdown menu and click the arrow next to the Font option to expand the section.
- You now change the font family, style, and size according to your preferences.
How To Add Time & Date in File in Notepad
This section is mainly for users who want to create .LOG files with Notepad. This is because the .LOG files automatically record the current date and time whenever we open or edit them. You can add the current date and time to any text document in Notepad by simply pressing the F5 key on the keyboard.
How To Change Text Alignment in Notepad
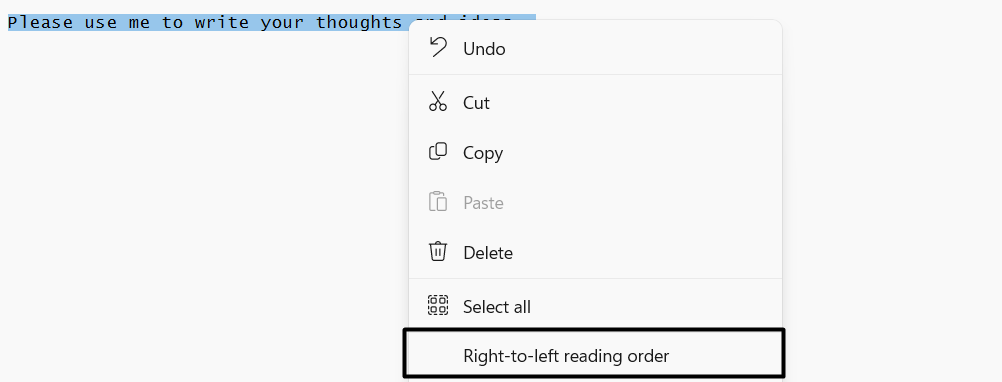
While writing text in Notepad, you can also change the alignment of the text according to your preferences. To align the text to the left, select the text and right-click to open the context menu. Then, select the Right-to-left reading order option to shift the selected text to the right. Once the text is shifted to the right, untick the Right-to-left reading order option to shift the text back to the left. That’s it.
How To Enable Word Wrap in Notepad
You can also use the Word Wrap feature to automatically move the cursor to the next line when it reaches the end without pressing the Enter key on the keyboard. Below are the steps to enable the Word Wrap option in Notepad:
- Open the Notepad app and click on the View option in the top menu bar.
- Click on the Word Wrap option and ensure it’s ticked, which means it’s enabled.
- At last, write two or three lines in the Notepad continuously, and you’ll notice that once the line reaches the end, the cursor instantly moves to the next line.
How To Change Page Setup in Notepad
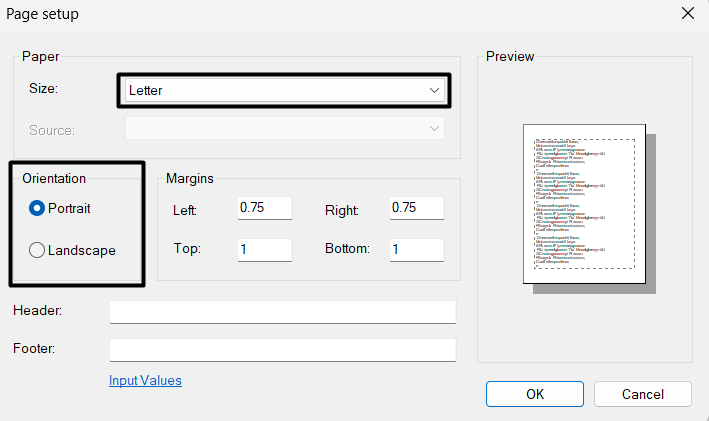
If you want to change the document’s size and page orientation, thankfully, Notepad allows you to do so in a few clicks. We suggest following the below-mentioned steps to alter the text document’s size and page orientation:
- Open the Notepad app and click on the File option in the top menu bar.
- Now, select the Page setup option from the File dropdown menu. 3. Click on the dropdown menu next to the Size option and choose from the available page sizes and types. You can also modify the page’s orientation by choosing between Portrait and Landscape.
- Finally, click OK to save the changes and file.
How To Save Text Documents in Notepad
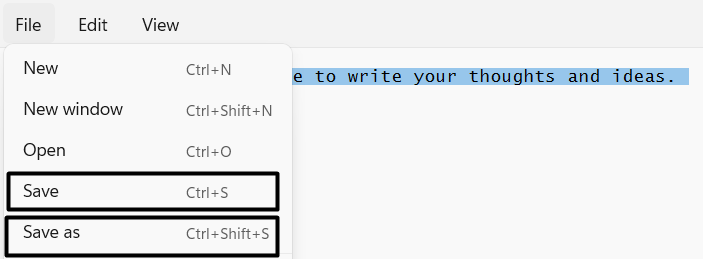
One of the easiest ways to save a new file is to hit the Ctrl and S keys concurrently on the keyboard. If you’ve made changes to an existing file and want to save the changes, press the Ctrl + Shift + S keys simultaneously. The same can be done using the Save and Save As options from the File dropdown menu.
How To Print Text Documents in Notepad
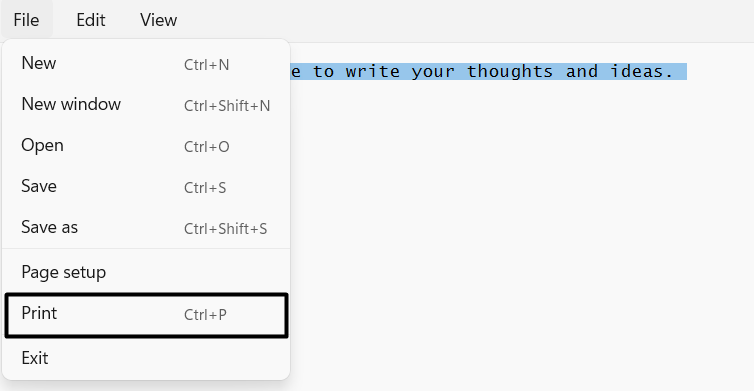
Once you’re done with creating the text document in Notepad, you can print the document right away in a matter of seconds. The process is pretty simple and easy to follow. To print the document, simply use the Ctrl + P keyboard shortcut, which is known to most of us. You can also do the same by selecting the Print option from the Edit dropdown menu.
How To Add/Remove Status Bar, Zoom In, Or Zoom Out in Notepad
The status bar in Notepad shows basic document information, such as the current line, column, zoom level, encoding format, and much more. Starting with changing the zoom level, use the Ctrl + Plus (+) key to zoom in and Ctrl + Minus (-) to zoom out. On the other hand, to enable the Status Bar option, follow the below-mentioned steps.
- Firstly, open the Notepad app on your Windows 11 PC and click on the View option in the ribbon menu at the top.
- Click on the Status bar option to enable it and ensure there’s a tick next to it. In case it’s already ticked, it means it’s enabled.
- Once the Status bar option is enabled, you’ll see it at the bottom of Notepad, showing basic information like total lines, columns, encoding format, etc.
How to Change Header and Footer Command
Notepad also allows customizing the header and footer of the document. For instance, you can add the page numbers, current date and time, document name, etc., in the header and footer of the document. Below are the steps to do this with ease from the Page Setup settings:
- Firstly, open the Notepad app, click on File in the top ribbon menu, and select Page setup.
- Once the Page setup section is opened, choose from the commands mentioned below as per your requirements and add them to the Headers and Footers section.
How To Create A .LOG File in Notepad
Creating .LOG files was never an easy task earlier, but now it has become more straightforward with Notepad. When we create a .LOG file with Notepad, it automatically adds the current date and time to record all the changes made to the file. You can easily create a .LOG file in Notepad using the below-mentioned steps:
- Start with opening an existing document or creating a new one and then type .LOG file in the document’s first line.
- Then, press the Enter key to move the cursor to the next line and use the Ctrl + Shift + S key combination to save the text document. The system will automatically record the time and date whenever you open and edit the document.
How To Change Encoding in Notepad
In simple terms, encoding refers to converting the information into a form the computer can easily read and write. Similarly, Notepad supports five encoding formats: ANSI, UTF-16 LE, UTF-16 LE, UTF-8 (default), and UTF-8 with BOM. You can change the encoding format of the document when saving it. If you also want to know the steps to change the encoding format, you can follow the below-mentioned steps:
- You can start by opening a new text document or creating a new text document in the Notepad program.
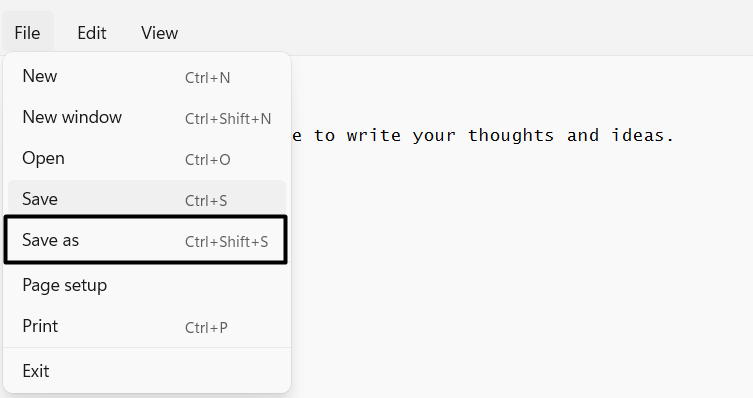
- Click on File in the top menu and select the Save as option from the dropdown menu to open the Save as dialog. 3. You’ll now see a dropdown menu right-next to Encoding. Click on the dropdown to see a list of all available encoding formats and choose one from them. Then, click on the Save button to save the changes.
How To Spell Check in Notepad
You can enable the Spell Check option from Windows Settings and use the Notepad app to write text documents without worrying about spelling errors. Here are the steps to turn on the Spell Check feature in Windows 11:
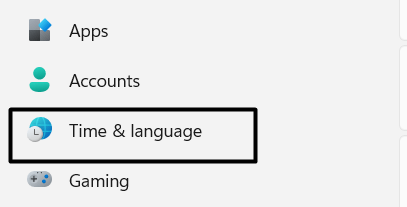
- To start, open the Settings app and move to the Time & language section from the left-navigation pane.
- Then, navigate to the Typing section and search for the Autocorrect misspelled words and Highlight misspelled words options.
- In the end, enable the Autocorrect misspelled words and Highlight misspelled words feature to highlight and autocorrect the misspelled words while using Notepad.
How To Create XML File With Notepad
To create XML documents using the Notepad program, you simply need to write the code in Notepad and add . XML at the end of the file name while saving the file. That’s it. You also check the image attached below for reference and better understanding.
How To Save Notepad As HTML
You don’t need a separate text editor to edit and write HTML code for a webpage, as Notepad allows you to do the same. But, saving a text file with HTML code differs from saving a text file with just text. When saving this kind of file, you must add .html after the file name at the time of saving the file. You can see the same in the below-mentioned image.
How Do I Get the Old Notepad Back on Windows 11?
Below are the steps to restore the classic version of Notepad in Windows 11:
- To start, open the Settings app and navigate to the Apps section.
- In the Apps section, click on the Advanced app settings section to expand it and then click on App execution aliases.
- Now, search for the Notepad (notepad.exe) app in the App execution aliases section and turn off the toggle right next to it. Once the toggle is turned off, open the Notepad program manually or just open a text file created with Notepad to see the change. You’ll notice that the older version of Notepad is back on your Windows 11 PC.
Write Documents With Ease in Notepad
There you go! Using Notepad was never a challenging task, and this guide also showed the same. In this guide, we learned about each feature of Notepad in detail and checked the steps to use them. We hope this detailed article clears all your doubts regarding the Notepad program. Let us know how this guide helped you crush the issue you faced while using the Notepad app.
How Do I Get Help in Windows 11?
Microsoft has an official support page and community where you can search for the issue and find troubleshooting guides on it. If the articles and members’ answers don’t help in any way, you also get the facility to connect with Microsoft’s customer support teams for personal assistance.
What Happened to Notepad in Windows 11?
Nothing has happened to the Notepad in Windows 11. It comes with the same features and works the same as earlier, but it has a new design that is still minimal and intuitive.
Does Windows 11 Have a Text Editor?
The new Windows 11 comes with a simple text and HTML editor called Notepad that can be accessed using varied ways, such as Windows Search Box and a few other ways.
Why Is My Notepad Not Working?
You can try resetting or repairing the Notepad program from Windows Settings to fix all the issues with the program.


![]()








![]()


